Estimated reading time: 4 minutes
Installing Apache on Ubuntu is easy, and I’m here to show you just how simple it can be. If you’ve ever wanted to turn your Linux machine into a web server, you’re in the right place. Apache is one of the most popular open-source web servers globally, and it works seamlessly on Ubuntu. Today, I’ll walk you through the process step by step, ensuring that you have your server up and running in no time.
Table of contents
What Is Apache and Why Should You Use It?
Apache is a free, open-source web server that allows you to host websites or applications. Whether you’re setting up a personal blog or a robust enterprise application, Apache is a versatile tool that gets the job done. It’s fast, secure, and highly customizable, which is why it’s a go-to choice for web administrators.
When paired with Ubuntu, one of the most stable Linux distributions, you get a powerful environment that ensures reliability for your web services. For official information on Apache, you can visit Apache’s official documentation.
Prerequisites Before You Install Apache on Ubuntu
Before diving into the installation process, make sure you’ve done a few basic things. You should:
1. Have Ubuntu installed and packages updated. You can check for updates by running:
sudo apt update 2. Have superuser (sudo) privileges. If you don’t have this, Apache installation may fail, as it requires administrative rights.
If you’re unsure how to update Ubuntu, you can check Ubuntu’s official guide.
Step 1: Installing Apache on Ubuntu
The first step is simple: installing Apache. On Ubuntu, the apt package manager makes this process a breeze. You’ll need to run the following command:
sudo apt install apache2 
Once you execute this command, Ubuntu will download and install Apache from its repositories.
Step 2: Verifying Apache Installation
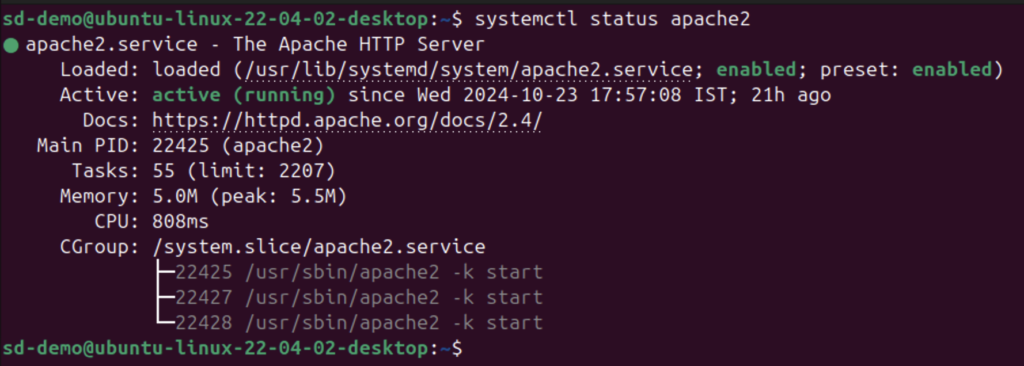
After installing Apache, the next step is verifying that it’s running correctly. To do this, you can use the following command:
sudo systemctl status apache2 You should see output that says something like “active (running).” That means Apache is up and working!

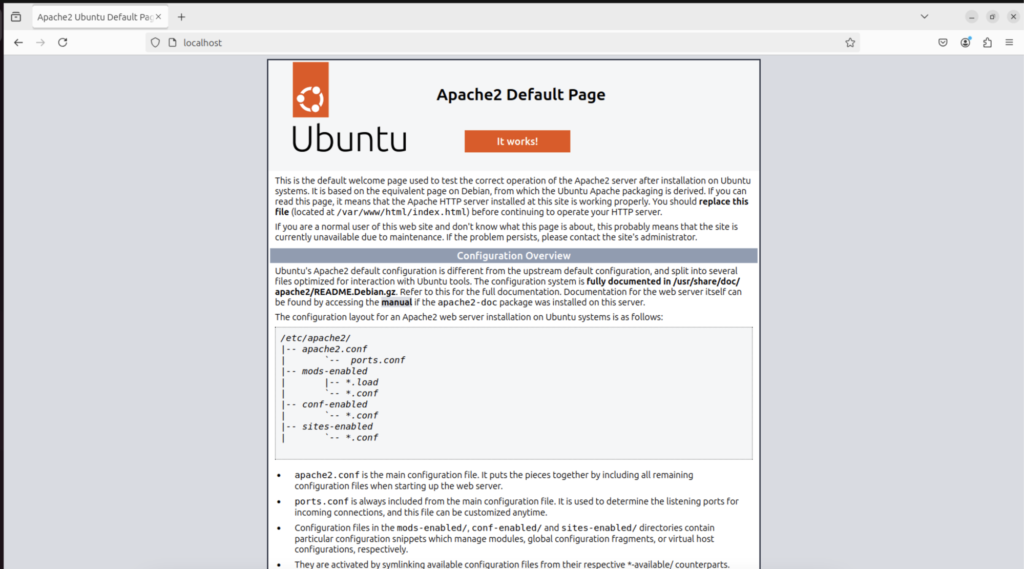
Now, open a web browser and type in your server’s IP address (or localhost if you’re working on a local machine). You should see Apache’s default welcome page. If this happens, congratulations! You’ve successfully installed Apache on Ubuntu.

Step 3: Managing Apache Services
Now that Apache is installed, you’ll want to know how to manage it. You can start, stop, or restart Apache using systemctl commands. Here’s how:
Stop Apache:
sudo systemctl stop apache2 Start Apache:
sudo systemctl start apache2 Restart Apache:
sudo systemctl restart apache2 Step 4: Configuring Apache for Your Needs
One of the reasons I love Apache is its flexibility. You can configure it to handle multiple sites, adjust the document root, and even enable SSL for secure HTTPS connections.
For example, to modify the default configuration, you can edit the Apache configuration file:
sudo nano /etc/apache2/sites-available/000-default.conf From here, you can change your DocumentRoot, which defines the directory from which Apache serves files. Once you’ve made your changes, restart Apache:
sudo systemctl restart apache2 For more advanced configurations, check out the Apache Documentation.
Troubleshooting Common Issues
Sometimes, things don’t go as planned. If Apache isn’t running correctly, here are a few commands that might help:
Check the error logs:
sudo tail -f /var/log/apache2/error.log Ensure Apache is installed correctly:
apache2 -v If you run into specific issues, you can consult the Ubuntu Server Guide for additional troubleshooting tips.
Conclusion
Installing Apache on Ubuntu is a straightforward process, and once it’s up and running, you’ll have a stable, reliable web server ready to serve your site or application. Whether you’re a beginner or an experienced user, this combination of Apache and Ubuntu provides a robust solution for hosting your web projects.
For more guides on Apache, web hosting, or server management, keep visiting SocketDaddy.com. I’ve got plenty of tutorials to help you along the way.


Only wanna say that this is handy, Thanks for taking your time to write this.